

Windows 11 will come preinstalled on any new PC you purchase, but your current Windows 10 PC could be eligible for a free upgrade. Microsoft offers several ways to get the new OS, so you can pick the method that works best for you.
Check for Compatibility
The conversation around Windows 11 requirements has been a confusing one. Before you can get the free update, you should first make sure your current Windows 10 PC is compatible. The best way to do this is to run Microsoft’s PC Health Check Tool.
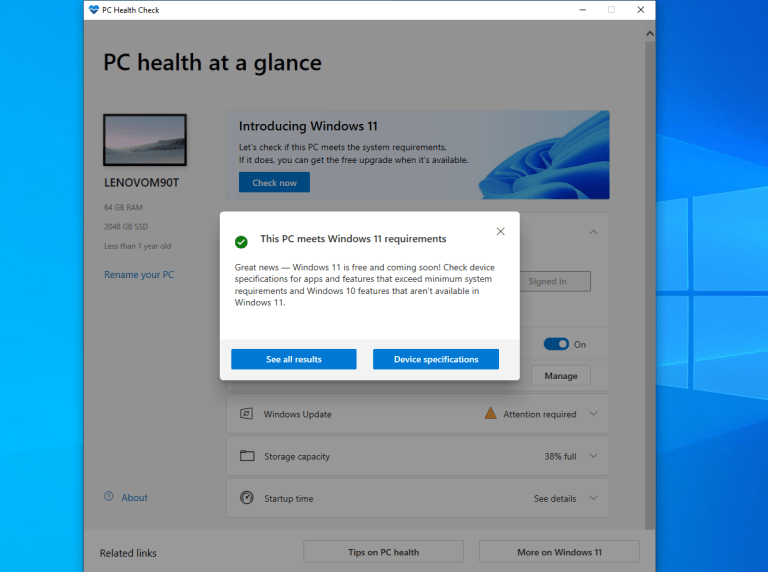
Go to the Windows 11 Specifications page and scroll to the bottom until you see the Check for compatibility section. Click the Download PC Health Check App link and install the program. Click the Check now button inside the app. If your computer is compatible, a message tells you that your PC meets Windows 11 requirements.
Check for Updates

Microsoft is slowly rolling out Windows 11 to compatible Windows 10 systems, so your next step should be to check if the update is available for your PC. On your Windows 10 machine, go to Settings > Update & Security > Windows Update and click the Check for updates button. If Windows 11 is waiting for you, it can then be installed.
Download With the Installation Assistant
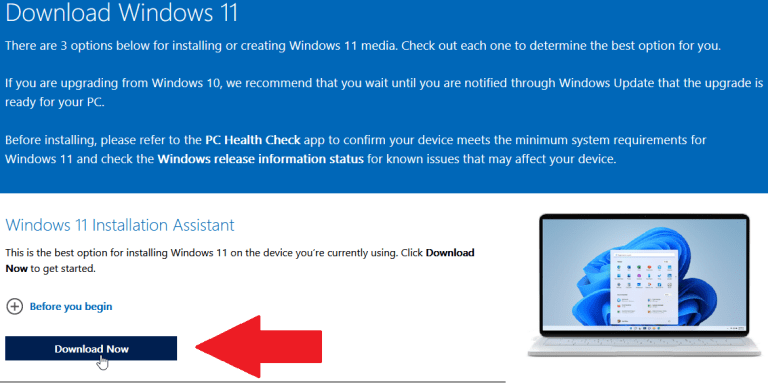
Instead of waiting for the upgrade to reach your machine, you can go through Microsoft’s Windows 11 Installation Assistant. Open the Download Windows 11 page and click the Download now button under the Windows 11 Installation Assistant section.
Run the downloaded Windows11InstallationAssistant.exe file. Click the Accept and install button and your Windows 11 installation will upgrade to Windows 11. You should be able to use your PC during the download and installation.

After the installation completes, you will be prompted to restart your PC. You are given the option to restart the machine immediately or wait for the 30-minute timer to end if you need time to save any open work. After your PC reboots, you can sign into Windows again. Once the final setup is complete, you are deposited at your new Windows 11 desktop.
Microsoft’s Media Creation Tool

Another option is to use Microsoft’s Media Creation Tool, which is a program that lets you create installation media for the new OS. At the Download Windows 11 page, click the Download now button under the Create Windows 11 Installation Media section.
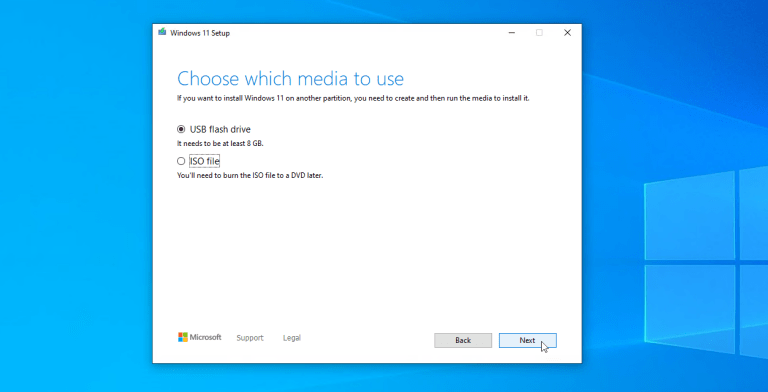
Run the MediaCreationToolW11.exe file, then accept the license terms and confirm the language and edition of Windows that you want. You can then choose to copy the installation files to a USB drive or generate an ISO file and burn it to a disk.
If you went the USB drive route, the tool then downloads the necessary Windows 11 installation files and copies them to the USB drive. Then open the drive and double-click the setup.exe file to kick off the upgrade.

If you wish to upgrade from an ISO file, choose a location for the file and change the name to something more specific. The installation files are then saved to your PC as an ISO file. Open File Explorer, then double-click the ISO file to open it and double-click the setup.exe file.

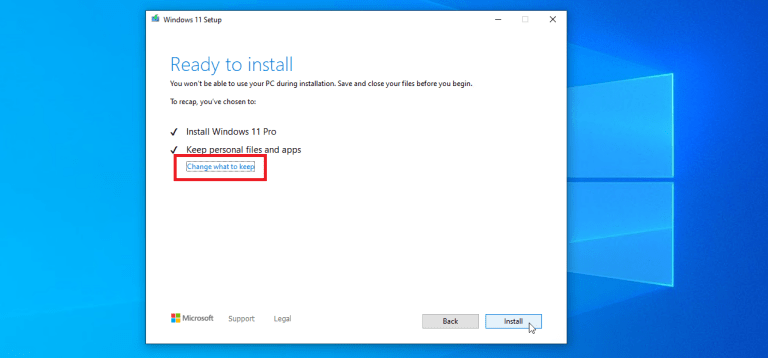
Click Next to have Windows 11 check for any updates, then accept the license terms. The Ready to install screen shows that Windows 11 will be installed and that your personal files and apps will be kept. To modify those choices, click Change. You can then elect to keep personal files and apps, personal files only, or nothing. Click Next, then Install to run the upgrade.
After your PC reboots, sign in to finish the setup. Depending on what you chose to keep, Windows may prompt you to customize your privacy settings. You’re then taken to the desktop.
Download Disk Image

You can also choose a direct download of the Windows 11 ISO file. At the Download Windows 11 page, go to the Download Windows 11 Disk Image (ISO) section and select Windows 11 from the drop-down menu. Select the product language, click Confirm, and then click the Download button to get the ISO file.
After the download, double-click the ISO file and then double-click the setup.exe file. Click Next at the initial install screen to check for and download any updates to Windows 11. At the Ready to Install screen, you will see that Windows 11 will be installed and personal files and apps will be kept by default.
If you wish to change this, click Change and switch to Personal files only or Nothing. Click Next, then Install to run the upgrade. After your PC restarts, sign into Windows 11 to view your new operating system.
